STEP 8
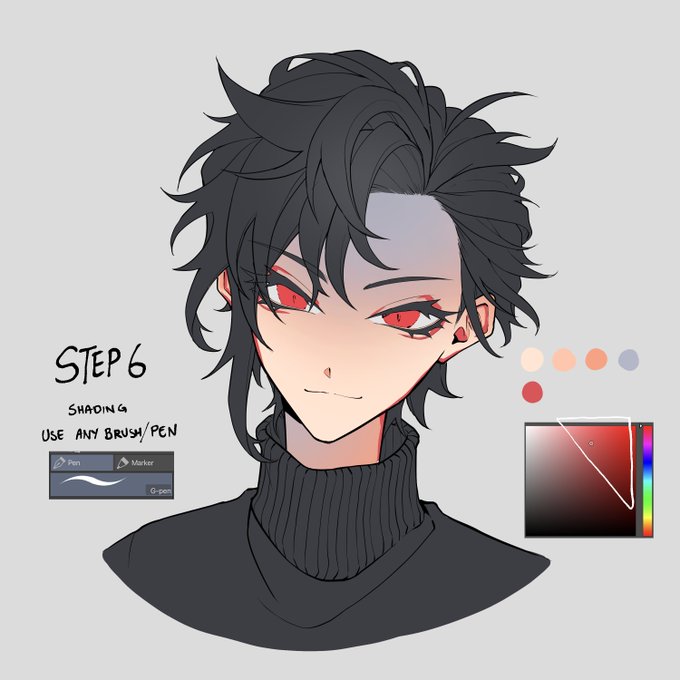
Adding shadows: Let's just say cool colours are commonly the best option to use for shadows. These hard shadows only works when it is behind hard parts (the hair, head to neck, ears etc) and largely depends on which lighting you use.
STEP 6 & 7
Now we're getting on the shading! I have to mention that I usually use a downloaded brush to do all the major shadings (Content ID: 1761353) however in my opinion, brushes don't really matter for now as we're just doing the basics!
(cont.)
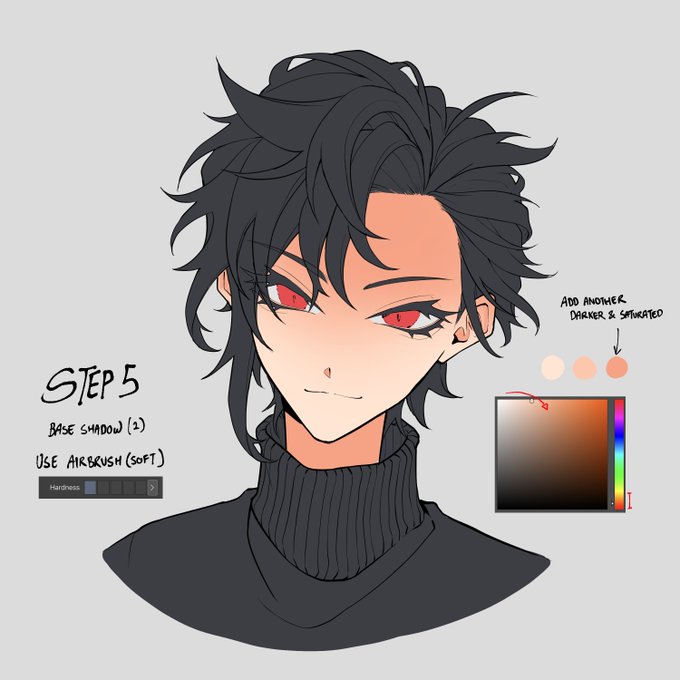
STEP 5 & 5.5 (lmao)
Same as step 4, add more base shading with different colours into the same layer. Let me tell you a secret, legends say adding blue shadows make your art pop more, so try doing that as well👀
Art tip: The neck will always be darker because of shadows!
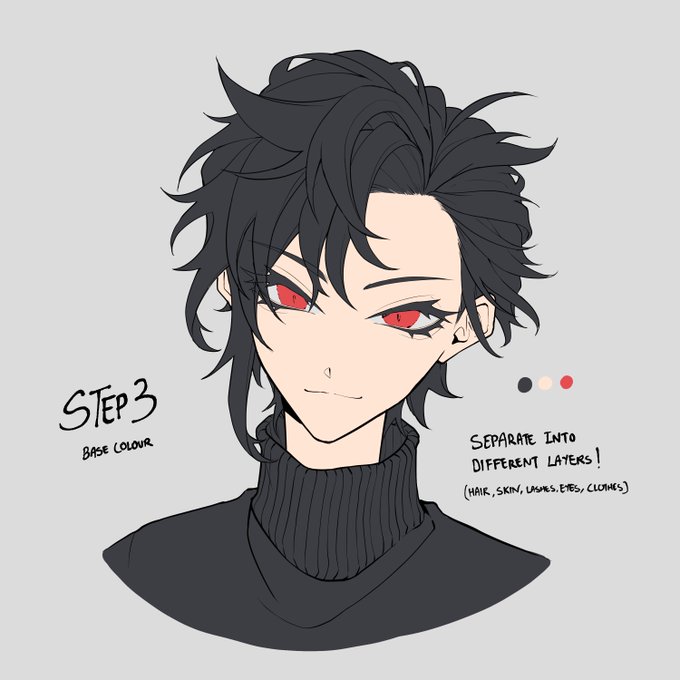
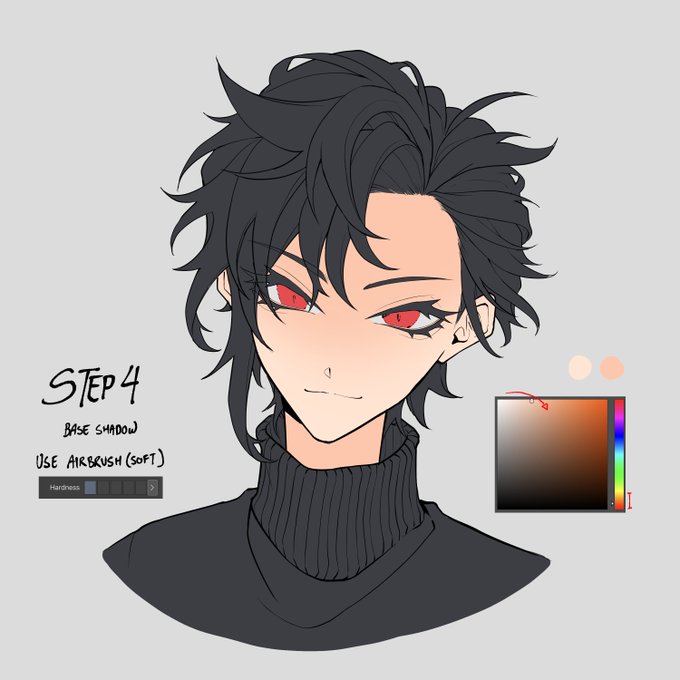
STEP 3 & 4
Put a base colour on it! Base colours are important so that you can know which colour scheme you will be using, again different each part on different layers. Once you're done, lock on your skin layer and use airbrush to add some base shading.
ART TUTORIAL 🎨🖌️
Part 1 / ?
How I Colour Skin!
I have arrive with a tutorial that no one asked for! I might be diving this tutorial into around 3 or parts focusing on skin, eyes, hair and clothes mainly using the default ready brushes in CSP!
Repost allowed!
Tutorial at 🧵
Close-ups 💙✨
Admittedly I remember I struggle a lot doing this piece 😭


