opacityのTwitterイラスト検索結果。 1,337 件中 44ページ目


@muffinyashleigh I used an app called Framecast and used the opacity at 100% lol


Character artists (especially you bois)!
Learn how to paint makeup properly. Stop taking a soft round with low opacity and adding the laziest smokey eye.
Contouring, highlighting, properly following the waterline... makeup is the hallmark of selling the portrait of a character.


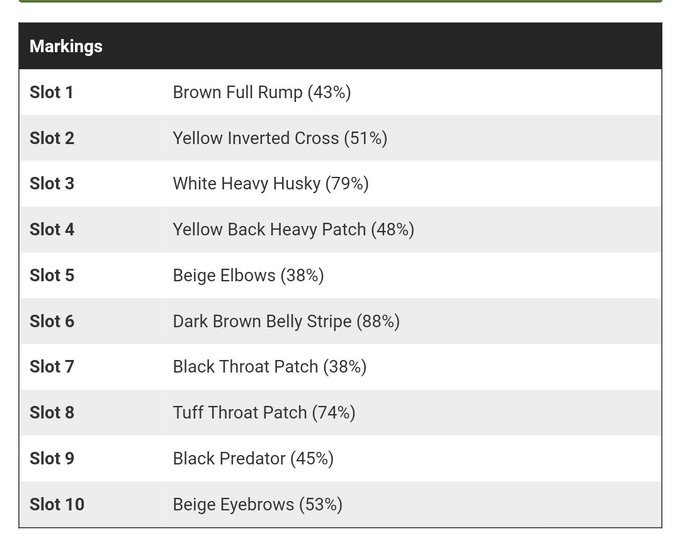
Oh yeah u wanna see a #walfgame glow up?? This is Mote, my first new Befriended wolf and one of my scouts, but he came with no marks, so i used a total shuffle on him and got This. I liked it, a lil muddy but I liked it? Until the other day I found myself opacity-fiddling him,


I did #90minartchallenge yesterday with Bobby Chiu and Masae Seki. It was fun and tough! For this challenge I limited myself by only using round brush with 100% opacity in 90 minutes.


@RosenniaArts Thank you for the art share ❤️
Hi I’m Tia and here’s some of my favorite pieces.
An art tip that made me love my art lately is I use a rough brush and do a low opacity, a new layer and paint over the art to give it a nice aesthetic look to it.


5 hour study/painting of Xiangling from Genshin Impact.
More direct experimental approaches with brush strokes and trying to rely less on transfer and more on opacity of the brush stroke. I wanna find a way to incorporate my sketches into the final piece to maintain gesture.


I tried to fix the opacity bug the better I can, I wish it works, feel free to use, modify or remake. #padoru #GirlsLastTour #2020IsAboutToEnd


terakhir tinggal kasih detail aja. nah buat cahaya cahaya itu aku bikin garis warna putih diblur dan layer luminousity yang opacitynya di turunin. sisa detailnya ya ngikut doang deh. setelah selesai semua contrass nya kunaikin dikit, jadi kayak gitu. THE END


dari sini di layer paling atas, (di atas line art) tinggal bikin efek cahaya tambahan dari arah yang sama. aku pake efek hujan yaitu warna putih yang opacity nya diturunin.


Please ignore my last tweet, it has two stupid mistakes related to opacity, ahahaha, gonna leave it up in shame of my mistake...
Here's the corrected version tho
#燃晚 #二哈和他的白猫师尊 #2ha #RanWan #楚晚宁 #Chuwanning #墨燃 #MoRan

13.
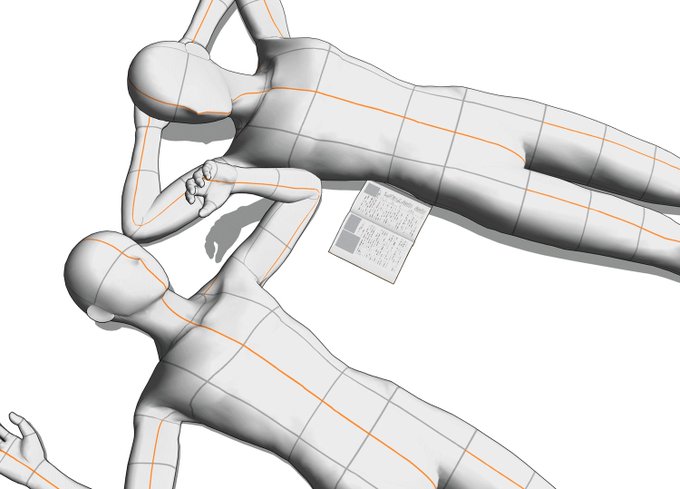
1: Finding a good reference or posing 3d models
2: Sketching (up to 3 sketches)
3: Lineart
4: Flat colors
5: Shading, adding details and lowering the opacity of the lineart (or coloring it)
6: Flatten image and add blur and texture


@RBIllustration (8/?) Here's an example of the same gradient map, set to the linear light blending mode, and opacity at 20%. This is laid on top of the original coloured image. (Original Image attached as reference)


6° (+layer+crop) for lighting turn on the add option, choose any color that is not to bright, preferably lower the opacity of the brush, I use the Ink pen hard too;

4°(+ layer+crop) turn on the multiply option, and start making zigzags with inkpen hard following the shape of the hair strands/ blend only the middle of these zigzags;(you can choose the opacity of that layer)


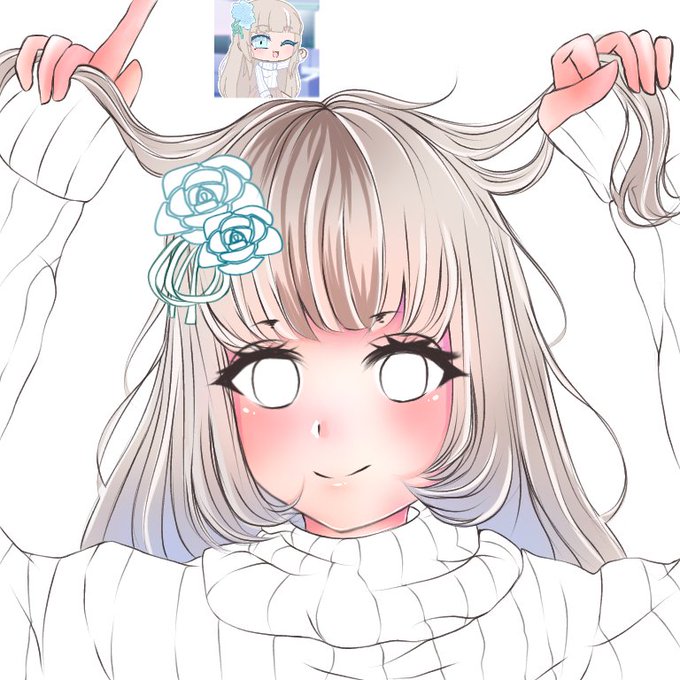
I saw on the tl that its helpful if artist share their drawing process so here it is:
-I do lineart
-Then colors and details
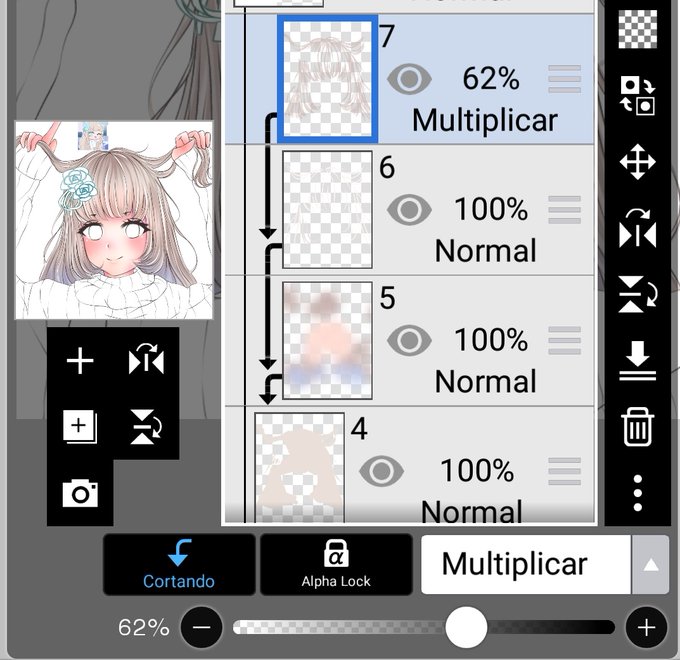
-1. Multiply layer (erase for light)
-2. Multiply layer to add more shadow
-Overlay
-add on low opacity
-maybe another overlay for texture


notkin: "so you were horny for this guy?"
artemy: "where did you learn that word"
notkin: "I know words why wouldn't I know that word no one taught me nothing"
*Grief in low opacity on the background*
#pathologic #pathologic2 #морутопия #notkin #Ноткин
#artemy


3. copy layer base warna, atur jadi warna putih via opsi hue, taruh lightsource bebas, lapisi dengan warna pilihan untuk shadow lalu mulai tentukan mana cahayanya
4. Set ke multiply, kalau merasa kurang, duplikasi lagi layer dan atur hue dan opacity.